Empowering the Future of Indian Media and Entertainment with AI
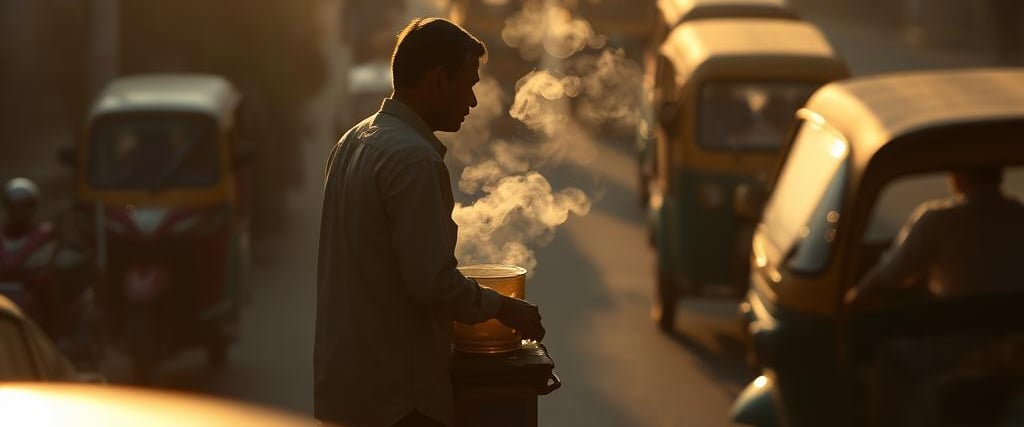
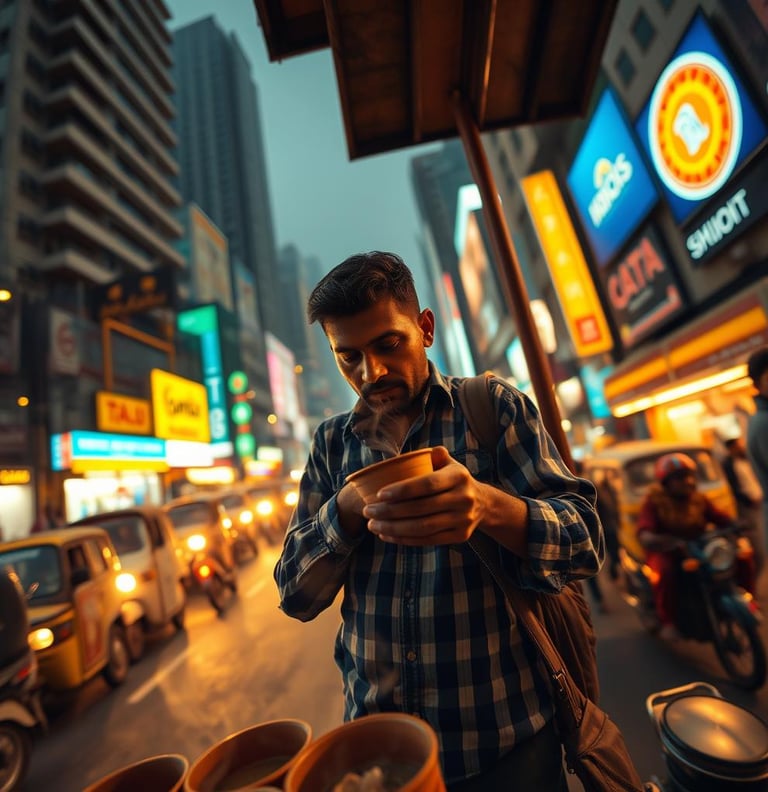
Amidst the bustling streets of Mumbai, a chai vendor pours steaming tea into a clay cup. The city hums around him, but for a moment, time slows as he watches the sun dip behind the skyline.
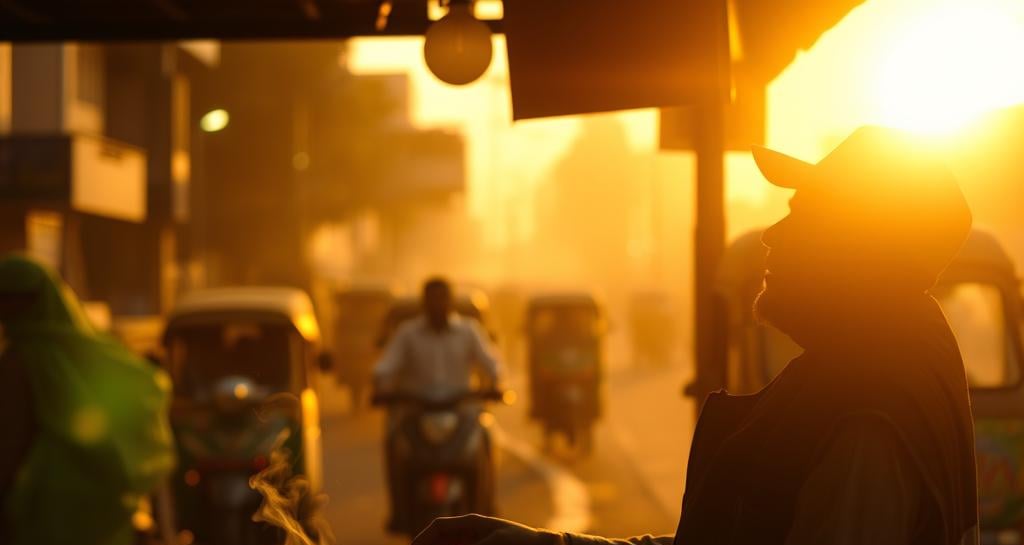
🎥 Technical Breakdown:
Shot Type: Wide shot, low angle
Lens: 35mm anamorphic (for depth and cinematic compression)
Lighting: Natural golden-hour sunlight, complemented by warm streetlight glow
Mood & Emotion: Nostalgic, poetic, tranquil
Camera Motion: Slow, subtle dolly-in to enhance immersion
Depth of Field: Shallow (sharp on vendor, blurred background)
Color Palette: Warm oranges, deep reds, soft evening blues
Step-by-Step Guide Cinematography Guide: "Chai Vendor at Sunset"
🎬📽️ Capturing the Poetry of a Fleeting Moment– Cinemascope (2.35:1)
🎬 Step 1: Pre-Production & Scene Setup
🔹 Planning the Shot for Maximum Cinematic Impact
Location Scouting:
Find a bustling Mumbai street with an open skyline for sunset visibility.
Ensure street vendors, rickshaws, and ambient elements are naturally present.
Timing:
Golden Hour is critical (approximately 30-45 minutes before sunset).
Check weather conditions for clear skies to enhance warm tones.
Blocking & Subject Placement:
Position the vendor’s stall at an angle where the sun sets behind him.
Ensure the steam from the tea is visible against the light source.
🎥 Step 2: Camera & Lens Setup
📸 Creating Depth & Atmosphere
Shot Composition:
Wide shot, low angle → Enhances the vendor’s presence against the sunset.
Vendor slightly off-center → Follows the rule of thirds for visual balance.
Lens Choice:
35mm Anamorphic Lens
Provides cinematic depth & compression.
Enhances golden-hour bokeh & dreamy separation between subject and background.
Depth of Field:
Use shallow focus → Keep sharp on vendor, let the background dissolve into warm bokeh.
Set aperture around f/2.8 to f/4 to maintain a balance of clarity & blur.
💡 Step 3: Lighting & Mood
🌅 Harnessing Golden Hour for a Nostalgic Aesthetic
Natural Lighting:
Use low-angle sunlight as the primary key light.
Position the vendor so sunlight contours his silhouette.
Practical Lighting:
Leverage a flickering streetlight as a secondary warm light source.
Optionally add a soft bounce (gold reflector) to enhance shadows.
Enhancing the Atmosphere:
Encourage vendor’s hand movement to create swirling steam against the light.
Capture floating dust particles to add depth & texture.
🎥 Bringing the Scene to Life
Camera Motion:
Use a slow, subtle dolly-in to create a sense of immersion & intimacy.
Keep movement smooth and controlled to maintain the tranquil mood.
Framing & Focus Transitions:
Start wide with full environment, then gradually tighten on vendor’s hands & face.
Allow background figures & rickshaws to move naturally, emphasizing the stillness of the vendor.
Final Adjustments & Takeaways:
Shoot multiple takes to capture variations of steam, lighting shifts, and vendor movements.
Monitor exposure adjustments as the sun dips lower.
🎞️ Step 4: Camera Movement & Execution
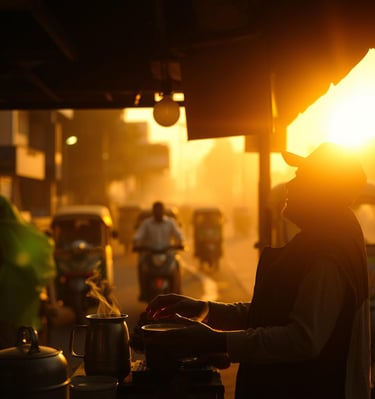
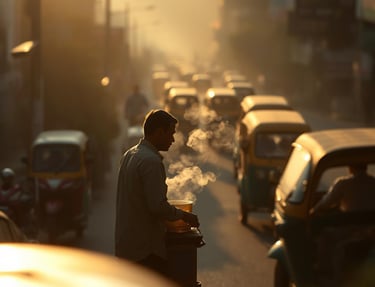
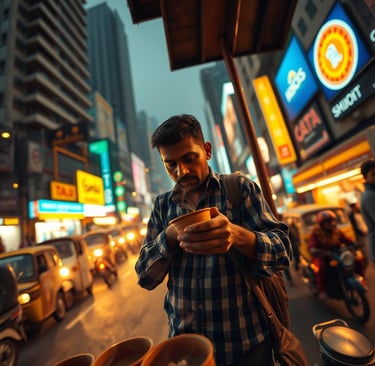
Variation 2:
A wide-angle cinematic shot of a chai vendor in Mumbai’s bustling streets at golden hour.
14mm anamorphic lens
Write your text here...
Step-by-Step Cinematic Guide: Ultra-Wide Depth – “Chai Vendor in Mumbai”
📽️ Capturing the Grandeur of Mumbai’s Chaos with a 14mm Anamorphic Lens
🎬 Step 1: Pre-Production & Scene Setup
🔹 Planning the Shot for Maximum Cinematic Impact
Location Scouting:
Choose a busy Mumbai street with:
Towering buildings & neon lights to create depth.
A chai stall positioned near street activity (rickshaws, pedestrians, shopfronts).
A railway line or train lights in the background for added dynamism.
Timing:
Golden Hour (30-45 minutes before sunrise) → Enhances warmth, rich contrasts, and long shadows.
Ensure clear skies or minimal cloud cover to let golden sunlight spill through the cityscape.
Blocking & Subject Placement:
Position the chai vendor centrally but slightly off-axis to allow depth in the frame.
Ensure motion elements (rickshaws, pedestrians, neon signs) surround the subject.
The tea stall should have detailed textures visible in the foreground (steam, cups, grains of dust).
🎥 Step 2: Camera & Lens Setup
📸 Achieving the Ultra-Wide, Deep-Focus Cinematic Look
Shot Composition:
Ultra-wide 14mm Anamorphic Lens → Expands the scene, exaggerating depth and perspective.
Low-angle shot → Emphasizes the chai vendor against the towering cityscape.
The chai vendor is in sharp focus, while background elements retain clarity for depth.
Lens Choice:
14mm Anamorphic Lens
Deep focus (everything sharp from foreground to background) → Enhances the grand scale of the environment.
Depth of Field:
Aperture: f/8 – f/11 to ensure clarity across the frame.
ISO: 100-400 (depending on light conditions) to preserve dynamic range.
💡 Step 3: Lighting & Mood
🌅 Harnessing Golden Hour for a Nostalgic Aesthetic
Natural Lighting:
Use low-angle sunlight as the primary key light.
Position the vendor so sunlight contours his silhouette.
Practical Lighting:
Leverage a flickering streetlight as a secondary warm light source.
Optionally add a soft bounce (gold reflector) to enhance shadows.
Enhancing the Atmosphere:
Encourage vendor’s hand movement to create swirling steam against the light.
Capture floating dust particles to add depth & texture.
🎥 Bringing the Scene to Life
Camera Motion:
Use a slow, subtle dolly-in to create a sense of immersion & intimacy.
Keep movement smooth and controlled to maintain the tranquil mood.
Framing & Focus Transitions:
Start wide with full environment, then gradually tighten on vendor’s hands & face.
Allow background figures & rickshaws to move naturally, emphasizing the stillness of the vendor.
Final Adjustments & Takeaways:
Shoot multiple takes to capture variations of steam, lighting shifts, and vendor movements.
Monitor exposure adjustments as the sun dips lower.
🎞️ Step 4: Camera Movement & Execution
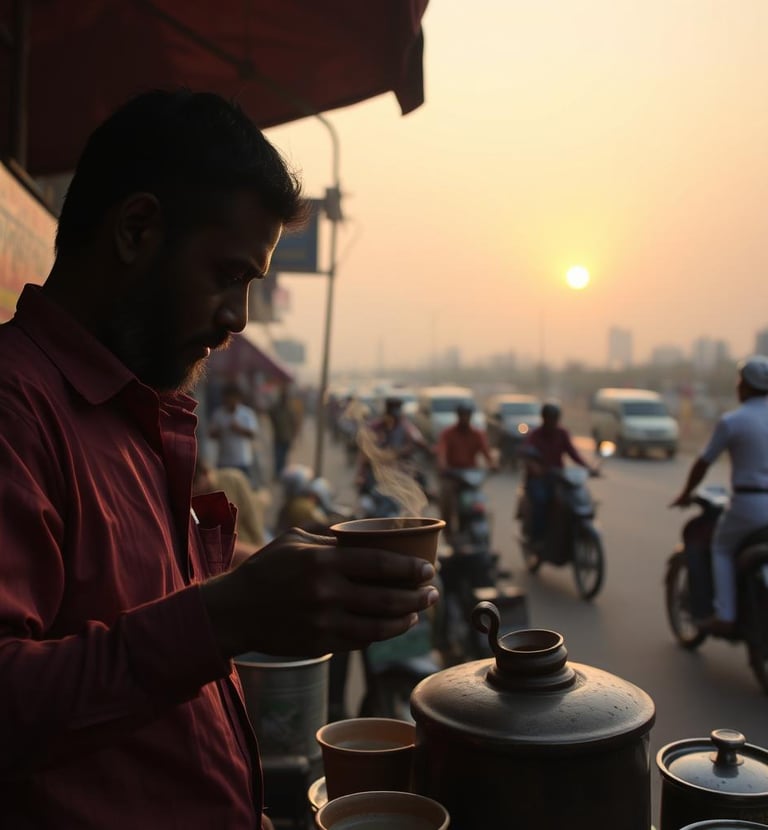
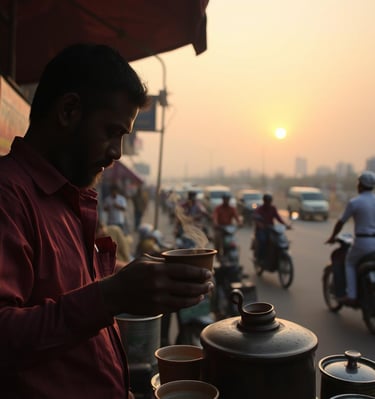
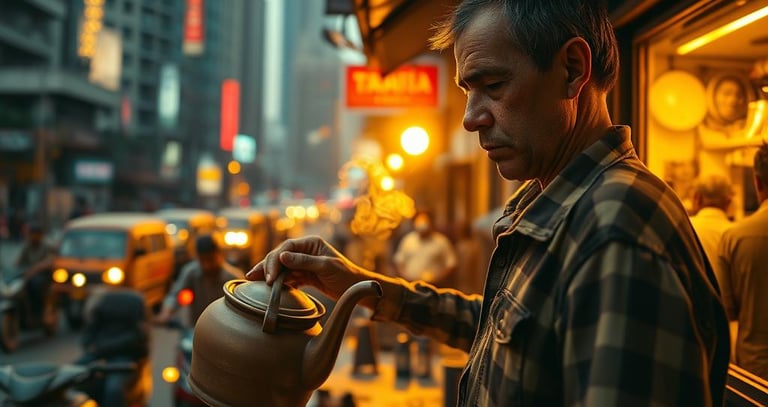
Variation 3: "The Spaghetti Western Chaiwala" (Cinematic Portrait)
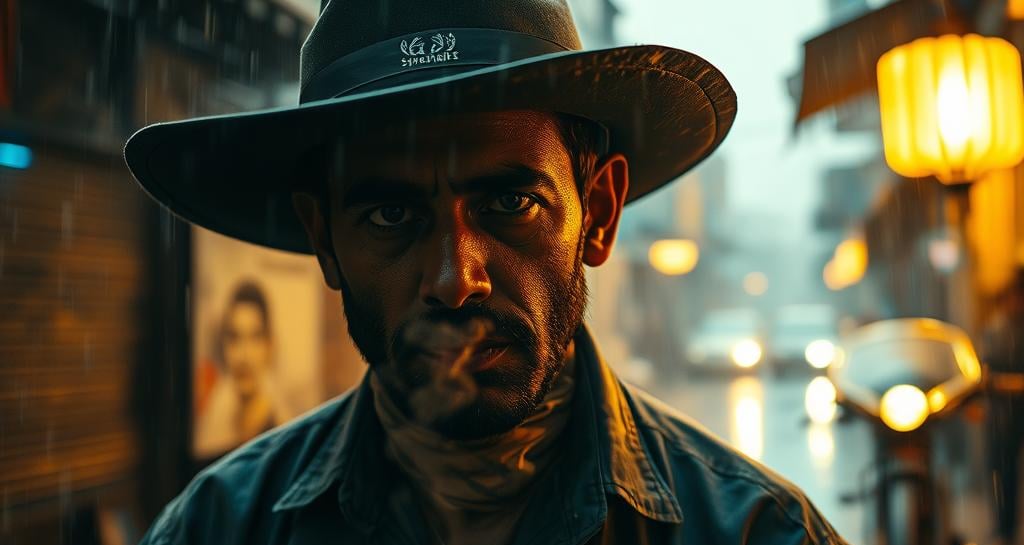

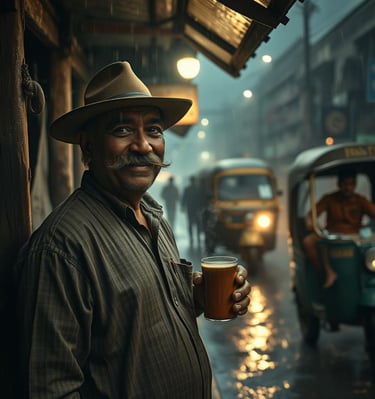
🎥 Technical Breakdown:
Shot Type: Wide shot, low angle
Lens: 85mm anamorphic (for depth and cinematic compression)
Lighting: Natural golden-hour sunlight, complemented by warm streetlight glow
Mood & Emotion: Nostalgic, poetic, tranquil
Camera Motion: Slow, subtle dolly-in to enhance immersion
Depth of Field: Shallow (sharp on vendor, blurred background)
Color Palette: Warm oranges, deep reds, soft evening blues
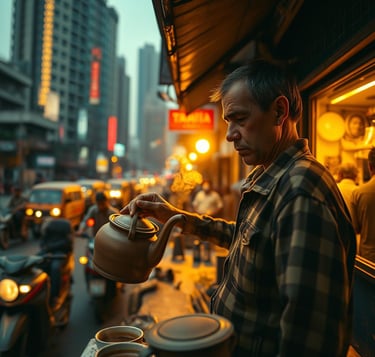
Step-by-Step Cinematic Guide: Ultra-Wide Depth – “Chai Vendor in Mumbai”
📽️ Spaghetti Western-Style 85mm Portrait
🎬 Step 1: Pre-Production & Scene Setup
🎬 Before the camera rolls, we set the foundation.
This step is the backbone of a great cinematic shot. The best cinematographers don’t just show up with a camera—they pre-visualize, location scout, and design the mood long before the shoot begins.
Since we are crafting a Spaghetti Western-style portrait of a chai vendor in Mumbai’s monsoon, let’s break down each pre-production element in full detail.
1. Choosing the Right Location
Your location sets the entire mood of the shot. Because we want a Western-style gritty environment mixed with Mumbai’s urban rain, here’s what to look for:
A. Characteristics of the Perfect Location
A chai stall under an old gas lamp or dim streetlight
This is essential for practical lighting. A flickering gas lamp creates the warm, old-school saloon glow that’s signature to Westerns.
Avoid locations that are too modern or well-lit—shadows and texture matter.
A muddy or rain-soaked street with puddles
Rain isn’t just an effect—it adds reflections, depth, and movement.
Look for streets where water can catch neon lights and headlights for extra texture.
Background with neon signs, shadowy figures, and moving rickshaws
This adds depth to the shot. A Spaghetti Western needs a feeling of isolation—but in Mumbai, we balance that with urban energy.
The bokeh of neon signs in the background will add cinematic richness.
Atmospheric haze, mist, or natural steam
A location near a busy street-side kitchen or railway will naturally have mist rising from sewers or food stalls.
Steam swirling in backlight mimics Western gun smoke, making the vendor feel like a gunslinger.
B. How to Find & Prepare the Location
Scout at night or golden hour to check the lighting conditions.
If the gas lamp isn’t bright enough, plan for a hidden LED to enhance it.
Talk to vendors and get permission to shoot—control over the environment is key.
If using artificial rain, plan how to set up a rain rig or use nearby water sources.
2. Setting the Time of Day
This shot demands a dramatic atmosphere, meaning we need the right time of day for perfect lighting.
A. Best Time to Shoot
Late Evening or Night (7:00 PM - 10:00 PM)
Ensures the gas lamp and neon lights are visible without interference from daylight.
Enhances contrasts between deep shadows and warm highlights.
During or Just After a Rainstorm
Captures falling raindrops while also getting wet, reflective surfaces.
If rain is too heavy, it can obscure details—a light drizzle or controlled mist works best.
B. How to Control the Lighting
If the streetlight or gas lamp is too dim, place a practical LED with warm diffusion behind it to boost intensity.
Use car headlights, neon reflections, and storefront lights to add depth.
Spray water on dry surfaces to maintain the wet look even between rain breaks.
3. Costume & Props for Authenticity
A Spaghetti Western aesthetic is built on character. Your chai vendor should feel like a lone cowboy in the storm, and small costume details will sell the scene.
A. Wardrobe for the Chai Vendor (Gunslinger Aesthetic)
A weathered, slightly oversized kurta or rugged jacket
This gives a sense of age, experience, and resilience.
Earthy sepia tones (brown, beige, dark green) match Western aesthetics.
Rolled-up sleeves & worn-out hands
The rolled sleeves mimic a gunslinger preparing for a duel.
His hands should show callouses, rough skin, or chai stains to tell a story.
A curled mustache, slight stubble, and a cigarette tucked behind his ear
Mustaches were iconic in Spaghetti Westerns (think Clint Eastwood’s grizzled look).
The cigarette, even if unlit, adds to his rugged presence.
B. Props & Details that Enhance the Story
A rugged, dented metal chai kettle
It should look well-used, like a cowboy’s revolver that’s been in many battles.
A clay cup (kulhad) for pouring chai
The steam rising from it will visually mimic a gunslinger’s cigar smoke.
A flickering gas lamp or dim LED lantern
Essential for creating practical, warm light on his face.
A wooden or metal table with visible rain droplets
The rough texture adds tactile realism to the frame.
4. Weather Control & Practical Effects
Monsoon rain isn’t just a backdrop—it’s an active storytelling element.
A. Capturing Rain for Cinematic Impact
How to Make the Rain Visible
Backlight the rain with a hidden LED or strong rickshaw headlights.
Use a slower shutter speed (1/48s) to enhance streaking raindrops.
Adjust angles so droplets catch neon reflections.
Enhancing the Wet Look
Spray extra water on surfaces to keep puddles alive even if rain slows down.
Wet the chai vendor’s clothes slightly—it adds realism without making him drenched.
Steam & Haze for a Western Gunfight Vibe
Use a small smoke machine or street-side cooking steam for added depth.
Position a hidden warm light to make steam glow in the rain.
5. Pre-Visualizing the Shot (Storyboards & References)
The best cinematographers pre-visualize every shot before stepping onto set.
A. Storyboarding the Scene
Break down the key moments in a shot list:
Wide establishing shot: Vendor under the lamp, rain falling.
Mid-shot push-in: His focused expression, steam rising.
Close-up: Chai pouring like a gunslinger holstering his revolver.
Background motion blur: Rickshaws streaking by in neon haze.
Use reference images for color & framing:
Look at classic Westerns like The Good, the Bad, and the Ugly for tone.
Study Mumbai rain photography for wet reflections & textures.
Use color palettes with sepia warmth + deep blues for contrast.
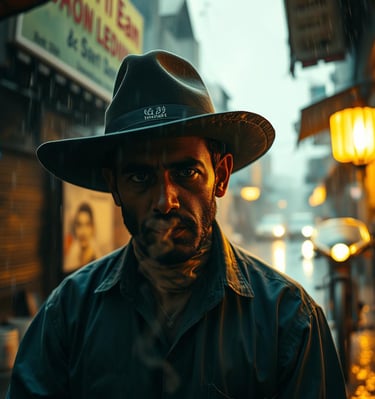
Introduction: The Vision
This scene is about creating a fusion of two worlds—the dusty, high-contrast aesthetics of a classic Spaghetti Western with the chaotic, rain-drenched realism of Mumbai’s streets. The chai vendor is our lone gunslinger, standing in the storm, unfazed, as the world around him flickers and moves in hazy motion. This guide will teach you how to capture this cinematic shot with precision, from choosing the right lens, setting up lighting, composing the frame, handling camera movement, and directing performance.
2.1. Choosing the Right Camera & Sensor
Your camera choice affects dynamic range, low-light performance, and cinematic depth.
A. Ideal Camera for the Shot
Full-Frame Cinema Camera (ARRI Alexa Mini LF, RED Komodo, or Sony FX6/FX3)
A full-frame sensor gives a shallower depth of field and rich detail.
The high dynamic range (HDR) is crucial for balancing streetlights, neon reflections, and deep shadows.
If shooting in low-light rain, use a camera with dual native ISO (Sony FX3 excels in this).
4K or 6K Resolution
A higher resolution allows more flexibility in post-production for reframing or subtle cropping.
Shooting in RAW (ProRes RAW, ARRIRAW, or REDCODE RAW) gives maximum control over color grading.
Log or RAW Format for Maximum Cinematic Look
Use ARRI Log-C, RED IPP2, or S-Log3 for better highlight retention.
This ensures deep shadows and glowing highlights without losing detail.
2.2 Selecting the Right Lens: 85mm Anamorphic for a Spaghetti Western Look
The lens defines perspective, compression, and cinematic storytelling.
A. Why the 85mm Anamorphic Lens?
Spaghetti Westerns use telephoto lenses (75mm-100mm) for character isolation.
An 85mm lens compresses the background, making the chai vendor feel separated from the city’s chaos—like a lone cowboy in the storm.
This adds intensity and a cinematic, dreamy separation from the world behind him.
Anamorphic Lens for Classic Western Widescreen Look
The 2.39:1 aspect ratio stretches the frame, adding epic scope and horizontal lens flares from neon lights.
Anamorphic lenses create oval bokeh in the background, making neon signs and rickshaw headlights feel painterly.
T2.0 to T2.8 Aperture for Shallow Depth & Soft Highlights
A slightly wide aperture (T2.0-T2.8) blurs the background but keeps the chai vendor sharp.
The rain and steam catch highlights beautifully with anamorphic flares.
Alternatives if You Don’t Have an Anamorphic Lens:
Use a standard 85mm full-frame prime and crop to 2.39:1 in post.
Use anamorphic lens adapters for that signature lens flare and stretched bokeh.
2.3. Camera Positioning & Framing: Low-Angle Standoff Shot
The camera’s position and movement dictate the shot’s power.
A. Low-Angle Shot for Western Heroism
Why a Low Angle?
Western cinematography often frames the protagonist from below, making them feel larger than life.
The chai vendor should feel like Clint Eastwood in a duel—silent, strong, and unfazed by the storm.
How to Set It Up
Place the camera slightly below chest level, tilted upwards.
Make sure rain droplets and neon reflections remain in the background for added atmosphere.
Alternative Framing Choices
A medium close-up (chest-up) captures the vendor’s expression and steam rising from the chai.
A rack focus from background neon to the vendor’s eyes adds visual storytelling depth.
2.4 Depth of Field & Focus Strategy: Isolating the Character in Chaos
Depth of field controls what the viewer’s eye focuses on.
A. Shallow Depth of Field for Intimate Isolation
F-Stop: T2.0 - T2.8 for Maximum Subject Separation
The chai vendor should stand out sharply while the background fades into dreamy bokeh.
The chaotic city remains visible but softened, enhancing the Western "lone wanderer" aesthetic.
Manual Focus Pulling for Dramatic Effect
Start by focusing on steam rising from the chai.
Slowly pull focus to the vendor’s mustache and eyes—a classic Western technique.
Using Rain as Foreground Depth
Let raindrops and reflections naturally blur in the foreground, adding layers to the image.
Shooting through wet glass or dripping surfaces enhances the Western grit and texture.
2.5 Camera Motion: Slow & Subtle Like a Gunslinger Duel
Camera movement controls pacing and mood.
A. Slow Dolly-In for Cinematic Presence
Why a Slow Push-In?
Westerns often use minimal but intentional motion, drawing viewers closer to the character’s intensity.
The vendor’s slow, rhythmic chai pouring should feel methodical—like a gunslinger’s duel prep.
How to Execute the Move:
Use a dolly or slider for a slow, creeping push-in.
If handheld, keep it steady and controlled, avoiding sudden jerks.
Time the move with key actions (e.g., chai pour, mustache twirl, glance toward the storm).
B. Alternative Motion Techniques
Slow Pan from Neon Streets to Vendor’s Face
Reveals the Western standoff atmosphere before focusing on the protagonist.
Handheld for a Documentary Feel (Only If Controlled)
If aiming for a gritty, rain-soaked realism, a subtle handheld style can work.
Keep movements smooth and minimal, letting the rain add natural energy.
2.6 Shooting Techniques for Rain & Neon Cinematic Effect
Rain is one of the hardest elements to shoot effectively.
A. Making Rain Visible on Camera
Backlight the Rain with Strong Light Sources
Position a rickshaw’s headlights or an LED behind the vendor to illuminate rain droplets.
If rain is too light, use a spray bottle or rain rig for controlled droplets.
Use a Slower Shutter Speed (1/48s) for Natural Motion Blur
Avoid high shutter speeds that make rain look like static specks.
The slower shutter adds smooth streaks to falling rain, making it feel cinematic.
B. Enhancing Reflections & Mood
Shoot at a Slightly Lower Exposure to Keep Shadows Rich
Underexpose by -0.5 to -1 stop to preserve neon glow and deep shadows.
Let the chai vendor’s warm light contrast against the cool rain reflections.
Tilt the Camera Slightly for a Gritty, Western Off-Balance Look
A subtle Dutch tilt (slight diagonal framing) makes the scene feel tense and dynamic.
Works great if the vendor is framed against moving background figures.
🎥Step 2: Camera & Lens Setup
🎭💡Step 3: Lighting for Mood & Drama
3.1 Understanding the Lighting Mood
Before setting up lights, we define the emotional tone we want to convey.
A. Mood & Emotion
Spaghetti Western meets Rain-Soaked Mumbai Noir
A blend of warm, dusty sepia tones (Western influence) and cool, moody blues (rainy night atmosphere).
A chiaroscuro lighting style—deep shadows with selective highlights—evoking mystery.
The vendor is a solitary, unshaken figure standing against the storm, much like a Western outlaw.
Contrast Between Warm & Cool Light
Warm glow from the flickering gas lamp on the chai vendor’s face.
Cool, neon street reflections on the rain-soaked ground and misty background.
Cinematic Textures: Steam, Rain, Reflections
The steam from the chai acts as a diffuser, softening light.
The rain makes the pavement reflective, enhancing depth.
Neon lights bounce off wet surfaces, adding layers of color.
3.2 Key Light: The Vendor’s Western Glow ☀️
The key light is the primary source of illumination.
A. Practical Key Light: Gas Lamp & Soft Warm Glow
Why use a practical gas lamp?
Western cinematography often uses warm, natural-looking light.
The flickering light mimics candle or firelight, reinforcing the old-school ruggedness of the chai vendor.
The soft falloff keeps shadows cinematic but not too harsh.
How to Control the Practical Light:
Position the gas lamp slightly to the side of the vendor’s face.
Use a bounce reflector (gold or white) to soften shadows on the opposite side.
If using an artificial light source, a small tungsten LED with diffusion mimics the warm gaslight glow.
3.3 Fill Light: Subtle, Natural, and Atmospheric
The fill light prevents excessive shadow darkness, but we don’t want to lose the noir mystery.
A. Low-Intensity Soft Fill from Neon & Reflections
How to Achieve It?
Use a large bounce board (or silver reflector) to catch ambient neon light.
Position it low, near the wet ground, so the light bounces upward—mimicking real street reflections.
If needed, add a low-intensity LED panel with blue gel for a subtle neon glow.
3.4 Backlight & Rim Light: Silhouetting the Hero in the Storm 🌧️
A strong backlight creates cinematic separation from the background.
A. Backlighting with Rickshaw Headlights
Why use vehicle lights?
Spaghetti Westerns often use strong backlights to silhouette heroes.
The rickshaw’s headlights create a dramatic rim light around the chai vendor.
This enhances rain visibility, making droplets glow like mist.
How to Position It?
Place the rickshaw angled slightly behind the vendor, facing the camera.
If using artificial lights, a high-placed LED with diffusion (5600K) mimics the effect.
Increase haze or mist in the air to make the light scatter beautifully.
3.5 Rain Lighting: Enhancing Water Visibility 🌧️🔦
Rain is tricky to film unless lit properly.
A. Using a Hard Backlight for Rain Visibility
What Works?
A strong directional backlight (like a high-placed LED or HMI).
5600K color temperature (daylight) for cool, crisp highlights on raindrops.
Position it off-frame, behind the vendor, so it catches every droplet.
Alternative Trick: Side Light for Extra Drama
A side-placed streetlamp can illuminate rain falling diagonally.
This adds a stormy, chaotic feel, like wind-driven rain in classic Westerns.
3.6 Enhancing Neon & Street Reflections 🏙️🌈
Mumbai’s streets come alive at night with neon, so we use these as natural lighting elements.
A. Using Practical Neon Lights as a Color Contrast
How to Use It?
Keep a vibrant red or blue neon sign in the background for contrast.
If needed, place a small RGB LED gelled red/blue nearby to simulate street reflections.
Let rain-covered surfaces catch the neon glow, adding dynamic movement.
3.7 Cinematic Tricks & Enhancements 🎥✨
To fully achieve the Spaghetti Western-meets-Mumbai-Noir look, we add extra layers of light manipulation.
A. Using Steam & Haze for Texture
How?
Use a small mist machine near the chai stall to create cinematic haze.
The backlight will catch the mist, making the steam from chai dramatic.
This adds a Western saloon-like dusty atmosphere, but with Mumbai’s monsoon twist.
B. Adding Lens Flares & Rain Streaks
How?
An anamorphic lens naturally produces horizontal neon flares.
If needed, apply a streak filter to enhance lens flare.
Place a wet glass surface in front of the lens to catch rain streaks.
Lighting is where we truly shape the scene’s cinematic personality—balancing warmth and grit, rain and neon, light and shadow to craft a Spaghetti Western aesthetic in Mumbai’s monsoon streets. This step is critical because lighting transforms a basic shot into a cinematic masterpiece, guiding the viewer’s emotion, depth, and focus.
🎬Step 4: Camera Motion & Execution
Now that we’ve set the stage with lighting and composition, it’s time to bring the shot to life with cinematic movement, framing, and execution. A great shot isn’t just about how it looks—it’s about how it feels. This step is where the audience connects with the moment, feeling the chaos of the rain, the vendor’s steady composure, and the raw, cinematic energy of a Spaghetti Western in Mumbai’s monsoon streets
4.1 Defining the Cinematic Motion Style
Before rolling the camera, we establish the movement philosophy that drives the shot’s storytelling.
A. Movement Philosophy: The Lone Gunslinger Approach
Western-Inspired Slow-Paced Tension
The camera moves like it’s watching a duel—methodical, deliberate, and immersive.
No erratic handheld motion—this isn’t an action sequence. Instead, movements are slow and intentional, adding weight to each frame.
The vendor’s calm, precise actions contrast against the chaotic rainstorm, making him feel larger-than-life, like a Western hero.
Controlled Motion, Like an Unfolding Standoff
Imagine a classic Western standoff where the camera slowly creeps in on the lone gunslinger.
This gives a sense of inevitability, tension, and a quiet confidence.
The rain and neon movement contrast with the stillness of the vendor, making him feel almost untouchable.
4.2 Choosing the Right Camera Movements 🎥
The way the camera moves defines how the audience experiences the shot. Here’s the motion breakdown:
A. Opening Shot: A Slow, Wide Dolly-In
Why?
Introduces the chai vendor in his element, letting the audience take in the environment first before focusing on him.
Feels like a Western establishing shot—wide, atmospheric, and storytelling-driven.
The slow motion builds tension, much like a duel approaching its climax.
How to Execute It?
Use a dolly or slider for a smooth push-in.
Keep the pace slow (10-15 seconds for full movement) to let the audience absorb the details.
The camera moves towards the vendor, making him feel like the center of the universe amidst the rainstorm.
B. Mid-Shot: Over-the-Shoulder or Tracking the Pour
Why?
Draws the viewer closer into the moment, allowing them to experience the vendor’s precision.
This movement makes the chai pouring feel like a cinematic ritual—just like a gunslinger loading his weapon.
How to Execute It?
Option 1: Over-the-Shoulder Push-In
Camera subtly moves over the vendor’s shoulder, tracking the tea pouring into the cup.
Creates a heroic, intimate perspective, making the viewer feel like a witness to something legendary.
Option 2: Rotating Close-Up (Steadicam or Gimbal Move)
A circular tracking move, wrapping slightly around the vendor, keeping the steam and rain in frame.
This adds a hypnotic, immersive quality to the shot, making the moment feel more legendary.
C. Hero Shot: The Western Close-Up
Why?
Classic Spaghetti Western portraits rely on tight, moody close-ups to capture the grit and charisma of the hero.
This shot defines the vendor’s personality, resilience, and quiet strength against the chaos of the rain.
How to Execute It?
Use the 85mm anamorphic lens for cinematic compression, isolating the vendor against the blurred neon city.
The camera stays completely still, letting the rain and background movement frame the intensity of the vendor’s expression.
If desired, a slight slow zoom-in can enhance the moment, adding a mythical quality to the character.
D. Final Shot: Silhouette & Departure
Why?
Just like in Westerns, the hero always leaves a lingering, iconic impression before the scene fades.
This mirrors a classic gunslinger’s exit, with the vendor standing tall as the rain pours down.
How to Execute It?
A low-angle shot emphasizing the vendor’s silhouette against the neon-lit, rain-soaked street.
The camera slowly tilts upward, exaggerating the hero-like stance.
The rickshaw’s headlights flare against the lens, adding a mystical, dreamlike fade-out.
4.3 Frame Rate & Motion Style
Frame Rate: 24fps for Classic Cinematic Look
Keeps the movement natural, fluid, and filmic—avoiding the artificial smoothness of high frame rates.
Optional: Slow-Motion (48fps or 60fps) for Emphasizing Rain & Steam
Only use for select moments, like the chai steam rising or the rain hitting the ground in extreme close-ups.
This should be used sparingly, ensuring the film remains true to Western realism rather than over-stylized slow-mo.
4.4 Camera Execution Techniques
A. Stabilization: Controlled & Deliberate
Use a dolly or slider for the opening wide shot push-in.
Switch to a Steadicam or gimbal for tracking movements around the vendor.
Keep the close-ups locked down on a tripod, ensuring crisp, Western-style intensity.
B. Lens Breathing: Enhancing the Atmospheric Depth
A slight manual focus pull between the vendor and background enhances the dreamy, rain-soaked depth.
The anamorphic lens naturally flares, creating Western-style lens streaks from the neon reflections.
C. Creative Framing: Using Reflections & Depth
Puddle Reflections:
Use low-angle shots capturing neon reflections in rain puddles for a moody, cyberpunk-meets-Western vibe.
Foreground Elements for Depth:
Let mist, rain, and passing figures move in the foreground, enhancing the sense of Mumbai’s living, breathing world.
4.5 Final Execution Strategy: Making Every Frame Count
"Every Frame a Painting" Approach
Each shot should be meticulously composed, like a Western showdown scene.
Think of every frame as a storytelling poster, ensuring rich composition and depth.
Slow & Purposeful Camera Moves
Resist the temptation to over-move the camera.
Let the rain, neon, and natural motion of the scene do the storytelling.
Heroic Isolation of the Chai Vendor
He’s the lone gunslinger, untouched by the chaos of the storm.
Every shot should reflect his unshaken nature amidst the ever-moving city.
Final Takeaways: Why This Execution Works
Spaghetti Western Influence – Slow, deliberate camera movement builds myth and tension.
Cinematic Contrast – The vendor’s stillness against the chaotic rain and neon world makes him iconic.
Hero Shot Mastery – Using close-ups, lighting, and framing, the vendor feels like an urban cowboy.
Depth & Atmosphere – Rain reflections, neon lighting, and slow motion add richness to the world.
🎨Step 5: Color Grading & Final Look
Now that we’ve captured the perfect cinematic frames, it’s time to craft the final look through color grading. This step will transform the raw footage into a fully realized visual masterpiece, blending the aesthetics of a Spaghetti Western with the neon-drenched monsoon streets of Mumbai. The goal is to evoke mood, atmosphere, and storytelling through color, ensuring the film has a timeless, cinematic quality.
5.1 Defining the Color Grading Philosophy 🎨
Before diving into the technical aspects, we establish the visual storytelling intent behind our grading choices.
A. Western Meets Mumbai Noir
Spaghetti Western Influence
Deep sepia tones, dusty warmth, and contrast-heavy grading evoke the rugged intensity of classic Westerns.
Shadows have a burnt amber tint, reminiscent of old film stock from Leone’s classics.
Mumbai Noir & Monsoon Realism
The rain, neon reflections, and wet streets call for deep blues and moody contrasts, similar to neo-noir films like Blade Runner.
The mix of warm and cool tones adds depth, creating a timeless, painterly look.
A Clash of Warm vs. Cool
The chai vendor’s warm glow (gas lamp & tea steam) contrasts with the cold, rain-soaked neon cityscape, enhancing the heroic isolation of the character.
5.2 RAW Footage Preparation: Setting Up for Color Grading
Before applying creative grading, the footage must be properly balanced and prepared.
A. Convert Footage to LOG Format (If Not Already Shot in LOG)
If the footage wasn’t shot in LOG (flat color profile), convert it using:
DaVinci Resolve: Color Space Transform (CST)
Adobe Premiere Pro: Lumetri LUT conversion
LOG footage preserves maximum dynamic range, allowing for richer grading flexibility.
B. Normalize Exposure & White Balance
Adjust the Base Levels
Ensure skin tones are natural before creative grading.
Use Scopes (Waveform & RGB Parade) to check for any extreme clipping.
White Balance Correction
Set neutral tones before adding creative colors.
Ensure neon reflections don’t overpower skin tones.
5.3 Primary Color Grading: Establishing the Base Look
Now that the footage is prepared, we apply the first major color correction pass.
A. Contrast & Exposure Adjustments
Push the Shadows for a Filmic Look
Lower the blacks slightly to enhance contrast.
Add a subtle fade to shadows, mimicking the grainy Western film look.
Highlight Enhancement for Neon Reflections
Raise mid-tones and highlights, ensuring wet surfaces catch neon reflections vividly.
Avoid excessive clipping—keep highlights cinematic and controlled.
Balanced Saturation
Desaturate non-essential colors, keeping the chai vendor’s warm tones as the dominant hue.
5.4 Secondary Color Grading: Sculpting the Cinematic Look
This is where the Western-Mumbai fusion truly comes alive through advanced color techniques.
A. Heroic Sepia Highlights vs. Cold Rainy Blues
Warmth for the Vendor (Sepia, Golds, Deep Reds)
The chai vendor’s skin, hands, and tea steam should have a dusty, golden warmth, making him feel legendary.
Use Hue vs. Saturation curves to enhance gold/orange tones selectively.
Cool, Neon-Drenched Shadows (Deep Blues & Teal)
The rain-soaked streets, rickshaw lights, and background haze should contrast with cool blue and deep teal tones.
Use Color Wheels to push shadows into deep blue without affecting skin tones.
B. Vintage Western Grain & Filmic Texture
Adding Grain for an Old-School Film Look
Classic Spaghetti Westerns have grainy, textured film stock.
Add a fine layer of film grain (ISO 400-800 style) in DaVinci Resolve or Premiere for authenticity.
Slight Glow for the Steam & Streetlights
Apply a subtle Glow effect to steam and flickering street lamps to enhance their atmospheric realism.
Halation for Classic Film Bloom
Western films have a characteristic bloom in bright areas.
In DaVinci Resolve, use Halation & Glow effects to create a gentle, filmic light spill around highlights.
5.5 Final LUT & Refinement: Bringing it All Together
Now, we finalize the cinematic grade and ensure the image matches our intended storytelling look.
A. Creating a Custom LUT for Consistency
Why a LUT?
Ensures a uniform look across the entire film, especially when working with multiple shots.
Helps maintain the Spaghetti Western meets Mumbai Noir aesthetic consistently.
How to Apply a LUT?
Create a custom LUT based on the finalized color settings.
Apply the LUT globally to all shots, making slight adjustments where needed.
B. Checking the Final Grade with Film References
Compare with Classic Western Films
Pull frames from Sergio Leone’s Westerns, ensuring the contrast and warmth match the classic look.
Check Skin Tones & Shadows
Use RGB Parade & Vectorscope to confirm skin tones remain natural despite strong color grading.
Final Touches: Vignette & Sharpening
Add a subtle vignette to draw attention to the vendor.
Apply gentle sharpening (not overdone) to enhance film-like crispness.
Predict the future by creating it
You didn’t come this far to stop


Creative Expressions
Discover how Mai Studio transforms creativity into unique, personalized art.
Mai Studio helped me express my individuality through art like never before!
Alex Johnson
Los Angeles
The intuitive platform of Mai Studio allowed me to create stunning visuals that truly reflect my vision. It's a game-changer for aspiring artists!
Samantha Lee
New York
★★★★★
★★★★★
mAI Studio
Torus Ambitio AI Tech Labs Pvt Ltd
Chandigarh, India
+91 828-884-0535
+91 828-884-0935
© 2025. All rights reserved.
Contact Us: